This post may contain affiliate links. I may earn a small commission if you click and make a purchase, at no extra cost to you.
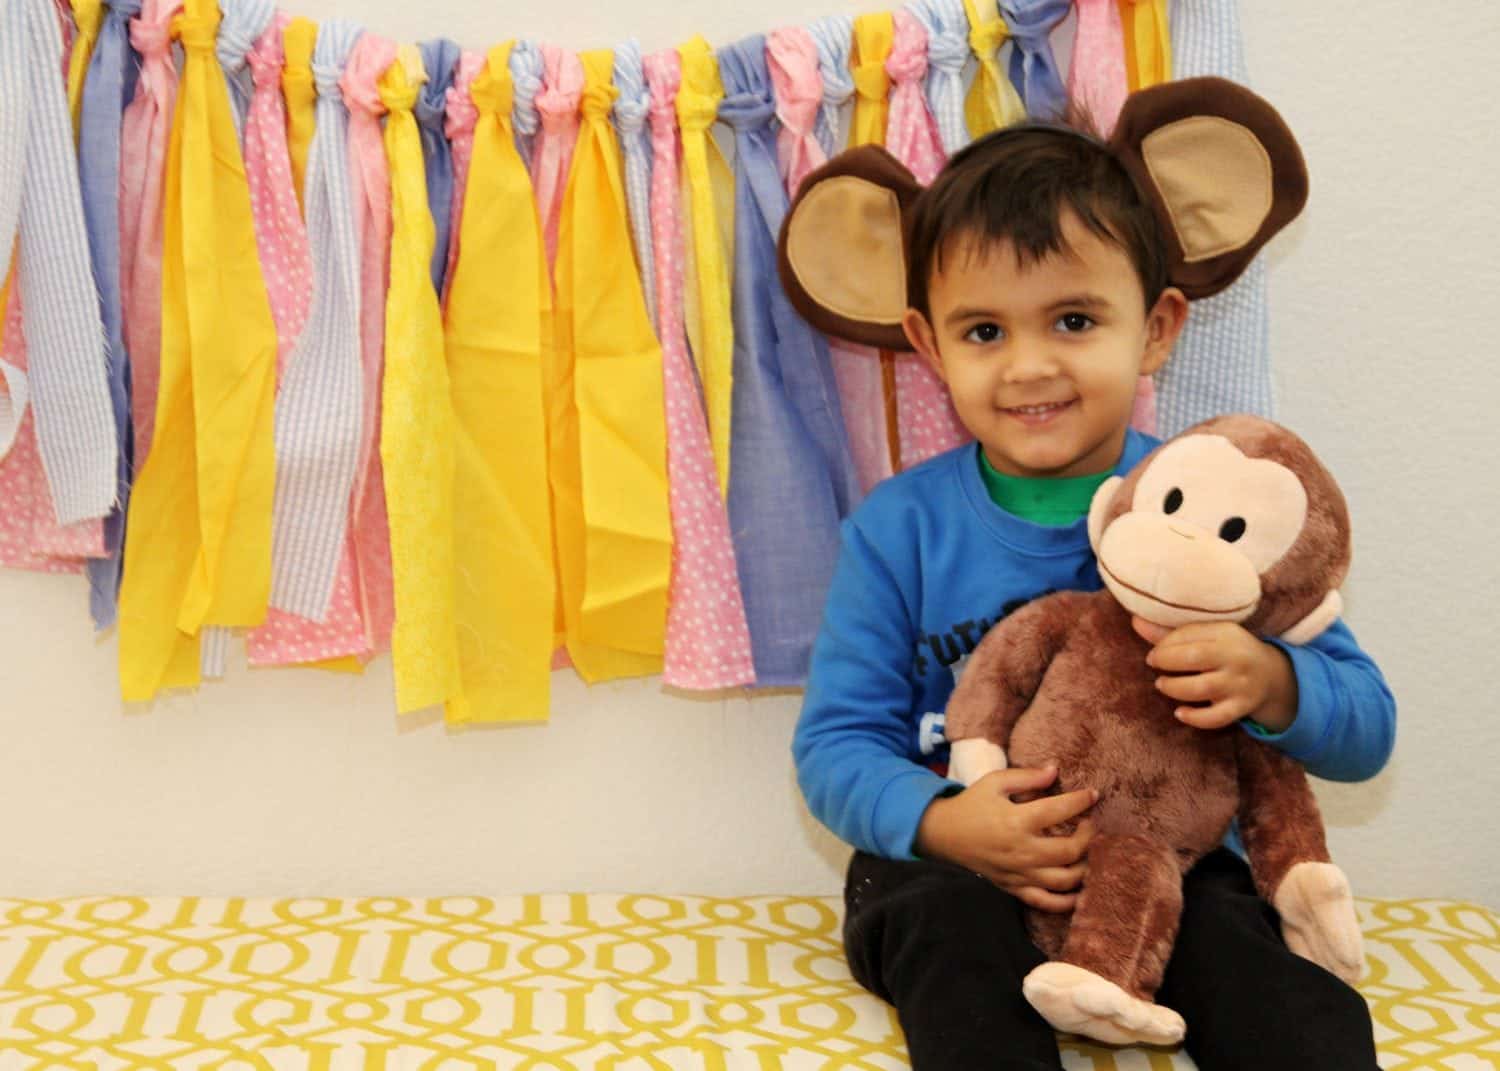
Monkey Party: DIY Monkey Headband Tutorial. Looking for a fun way to take your Monkey Party to the next level. I’m sharing a cute DIY Monkey Headband Tutorial today. Be sure to check out all of our Monkey Party Ideas and Inspiration as well as the Girly Monkey Party these headbands were featured in.
If you are planning a monkey themed birthday celebration, a jungle adventure party, or anything inspired by silly, giggly, banana loving monkeys, this adorable DIY Monkey Headband craft is the perfect activity to include. Kids love wearing costume pieces that help them jump right into character, and nothing sparks imaginative play quite like a pair of big, floppy monkey ears perched on top of their heads.

Whether you set these out as part of a dress up table, use them as party favors, or include them in a hands on crafting station during the party, these headbands are guaranteed to bring out the smiles, the silliness, and the full monkey energy every birthday kid dreams of. What makes this DIY craft especially wonderful is how simple and budget friendly it is. Using materials you can gather at any craft store or even from leftover supplies at home, you can create a whole bunch of monkey headbands quickly and affordably.
The steps are easy enough for kids to follow along but still polished enough to look adorable in party photos. It is the ideal blend of hands on fun and picture perfect party style. You can match the colors to your theme, add embellishments, or keep them classic with brown and tan felt.
Crafting activities like this also help balance the flow of a party. Kids who want a break from running around can sit, create, and enjoy a quiet moment. Parents love watching their little ones focus and create something they can proudly wear for the rest of the celebration. These headbands also make incredible take home gifts for your monkey party, combining the charm of a craft with the usefulness of a dress up item.
Fun, adorable, and easy to create, these DIY Monkey Headbands are the perfect finishing touch to your jungle themed celebration.
For my little Emma’s Monkey party, I made some fun Monkey Ear Headbands for all the kiddos to wear. These were super cute and the kids LOVED them. They also made for some great photo ops!! (I love me some good photo ops!!)
Today I’m sharing how to make them with all of y’all:)
Creating your own DIY Monkey Headband is surprisingly simple, and walking through each step helps the process feel fun and approachable for all ages. This tutorial is designed to be kid friendly while still resulting in a cute and sturdy accessory they can wear throughout the party. With just a few key materials—felt, scissors, glue, and a plain headband—you can transform ordinary craft supplies into the most adorable jungle themed costume pieces.
Start by gathering your felt colors. Most monkey headbands look best with a darker brown for the main ear and a lighter tan or beige for the inner ear. You can also mix in pinks or other colors if you want a more whimsical or playful style. Print or draw your ear template, then trace it onto your felt. Cut out two large outer ear shapes from your darker felt and two smaller inner ear pieces from your lighter felt. This layering gives the ear its classic rounded monkey look.
Once your felt pieces are ready, it is time to assemble. Glue the lighter inner ear shapes onto the darker outer ears, centering them so they form a neat border. If kids are helping, using a glue stick or tacky glue keeps things neat while still holding everything firmly in place. Adults can use a hot glue gun for a faster set, especially if preparing several headbands ahead of the party.
Next, fold the bottom edge of each ear slightly and glue it to create a rounded base that fits snugly around the headband. This step gives the ears their three dimensional shape and helps them sit upright instead of laying flat. Once the bottom is secured, apply glue directly to the fold and attach the ear to the top of your headband. Repeat with the second ear, spacing them evenly so the headband looks balanced when worn.
Allow everything to dry completely before handling. When the glue is set, your adorable monkey headband is ready for wearing, gifting, or displaying at a crafting station. Kids love choosing their own colors and helping with assembly, and the finished headbands add so much character to photos and dress up play.
Step by Step Instructions:
Materials:
- Brown Felt
- Tan Felt
- Thread
- Sewing Machine
- Paper Plates
- 1/2″ Black Plastic Hair Headband – 36 Pieces


Step 1: Cut The felt into half circles about an inch bigger than you would like the finished ears to be. You will need to cut 2 pieces of brown felt and 1 smaller piece of tan felt per ear (two ears per head band=4 large brown and 2 small tan pieces per headband)
 Step 2: Sew the small tan piece into the center of one of the brown pieces. Turn that piece upside down and sew the large brown piece onto another brown piece (the tan piece should be on the inside.)
 Step 3: Trim off the excess brown felt. Turn the Ear inside out and trim the edges of the tan piece.
 Step 4: Cut a paper plate so that it fits inside of the ear and the rounded edge fits inside the ear.
 Step 5: Put the plate inside the ear. Make sure the plate doesn’t extend too far down the ear so you don’t end up sewing through the plate. Your sewing machine needles will thank you!!
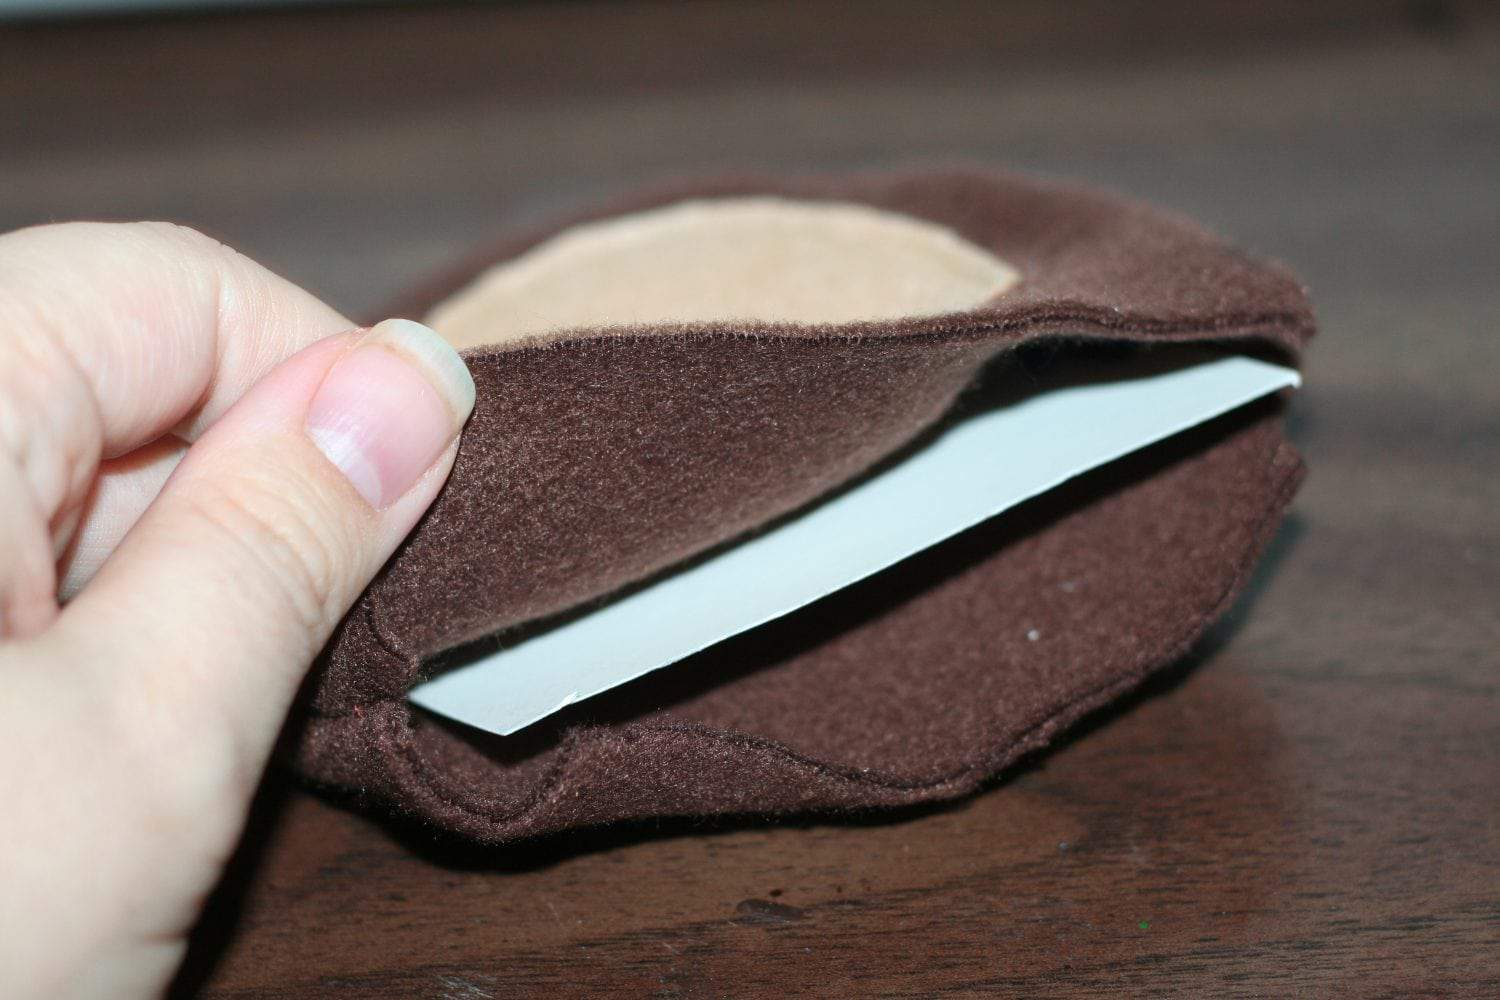 Step 6: Fold the edge over and sew it closed about 3/4″ from the fold. This will give you a slit at the bottom of each ear that you can slide the plastic headband into.
 Step 7: Slide the ears onto the headband and fold them forward so they stick out. The paper plate will help make the ears stand out.
 Fairly easy and super cute when you are all finished….Check out little Monkey Emily…isn’t she a cutie:)
Monkey Party Tableware
The easiest way to serve all the glorious party treats you make and buy is with themed party ware. This is budget friendly and keeps the design flowing through every part of your party. Definitely a must buy. When you are working with a lively theme like monkeys or jungle animals, your tableware becomes an instant and effortless way to reinforce the theme. Guests notice the bright colors, cute prints, and coordinated details the moment they approach your food table, which helps your entire setup feel cohesive and thoughtfully styled.
Using themed plates, napkins, and cups featuring jungle leaves, bananas, or sweet monkey faces gives your party an instant visual boost. Even if you choose simple snacks such as fruit, chips, sandwiches, or cupcakes, they look elevated when served on themed tableware. This is also one of the simplest ways to keep your design consistent without needing tons of decorations. A well chosen set of plates and napkins can do a lot of the visual lifting for you, tying the monkey headbands, favors, and activities together with a single coordinated look.
Themed party ware is also wonderfully practical. It streamlines cleanup, helps kids feel excited about mealtime, and makes even the simplest display feel intentional. It is an affordable, impactful upgrade and truly a must have for planning your monkey themed celebration.
Sock Monkey Supplies from Oriental Trading

Monkey Plates from Meri Meri

Conclusion for Monkey Headband Tutorial
This DIY Monkey Headband craft is one of those rare party activities that hits every sweet spot. It is simple enough for kids to enjoy, cute enough to look amazing in photos, customizable enough to match any jungle color palette, and budget friendly enough that you can make dozens without worry. Whether you offer this craft at a party table, prepare the headbands ahead of time for dress up fun, or turn them into adorable party favors, they help bring the entire theme to life in the most joyful and imaginative way.
One of the biggest benefits of this tutorial is how accessible it is. You do not need extensive crafting experience or fancy materials to create something beautiful. Felt is inexpensive, headbands are easy to find in bulk, and basic craft glue handles most of the work. The steps are clear, repetitive, and easy for kids to follow, making it a perfect hands on activity during the party. Families love crafts that double as wearable keepsakes, and these monkey headbands check that box perfectly.
Beyond the craft itself, headbands contribute to the overall energy of your celebration. When guests arrive and see other kids wearing monkey ears while running around, taking photos, or participating in activities like “Pin the Banana on the Monkey,” they cannot help but join the fun. The headbands become part of the atmosphere in the same way as balloons, banners, and backdrops. They enhance photos, spark imaginative play, and help the party feel cohesive without requiring complicated decor.
Another wonderful aspect of these headbands is how beautifully they complement other monkey themed ideas. They encourage pretend play, which keeps kids entertained and engaged throughout the event.
Ultimately, the success of a monkey themed celebration lies in simple, joyful details—and this headband craft delivers exactly that. When kids leave your party still wearing their headbands, clutching their favors, and talking about the fun they had, you know you created something special. That is the heart of all great parties: celebrating your child with creativity, love, and a little bit of laughter. This DIY Monkey Headband tutorial helps you do exactly that, giving your little monkeys a delightful way to swing into their party fun and remember the day long afterward.
If you love this tutorial, pin this image to your Monkey Party Pinterest Board:

Related posts for How to Throw a Monkey Birthday:
- Penguin Party Ideas
- Woodlands Animals Party Ideas
- Monkey Party Ideas
- DIY Monkey Headbands
- Circus Party Ideas
- DIY Sloth Cookies and Cupcakes
- DIY Penguin Cookies and Cupcakes
- DIY Tiger Cookies and Cupcakes
- DIY Raccoon Cookies and Cupcakes
- DIY Cat Cookies and Cupcakes
- DIY Panda Cookies and Cupcakes
- How to Throw a Cat Themed Birthday Party

Pingback: Simple Panda Cookies & Panda Cupcakes Recipe | Mimi's Dollhouse
Pingback: Plan a Perfect Party Animal Birthday | Mimi's Dollhouse