This post may contain affiliate links. I may earn a small commission if you click and make a purchase, at no extra cost to you.
How to build an amazing castle for your princess party!
Princess Party: DIY Backyard Castle Tutorial. What’s a princess party without a castle? This castle tutorial will make your little princess smile and really make your party a royal affair! Easy DIY instructions for an extra special party prop!
here is something truly magical about building a princess party around a whimsical DIY element that becomes the centerpiece of your celebration. As much as I love gorgeous printables and themed tableware, there’s a unique kind of joy that comes from creating a statement piece with your own hands—and nothing captures that feeling quite like a handmade castle backdrop.

Whether you’re planning a fairytale birthday, hosting a magical dress-up playdate, or styling a princess-themed photo shoot, a DIY castle instantly transforms your space into a royal wonderland and makes every little princess feel like she’s stepped straight into her storybook.
Throwing a PRINCESS PARTY?
☑️ This Disney Princess Party Kit is the perfect set to get your party planning headed in the right direction!
The thing I love most about this castle tutorial is how surprisingly attainable it is. You don’t need expensive materials, power tools, or elaborate crafting skills. With a few basic supplies, a bit of time, and a dose of creativity, you can build a stunning castle facade that looks like it belongs in an enchanted kingdom. It’s budget friendly, customizable, and absolutely guaranteed to make an impression. Whether you’re designing soft pink turrets for a Sleeping Beauty party, purple towers for Rapunzel, icy blues for a Frozen celebration, or classic gold accents for a general royal theme, this castle can be tailored to match any color palette or princess style.
This project is also a dream for photos. A castle backdrop instantly anchors your dessert table, gives you a perfect place for guests to pose, and sets the tone for the entire event. Kids LOVE walking up to a castle that’s clearly been built just for them. Their faces light up, their imaginations activate, and suddenly you have not just a party—but an experience.

If you’ve ever looked at those Pinterest-worthy princess parties and thought, “I wish I could make something like that,” this tutorial is truly your moment. It’s easier than it looks, it’s incredibly rewarding, and it adds that unforgettable wow factor your celebration deserves.
Let’s dive into how to create a castle that will make your little one feel like royalty… without requiring a royal budget! Looking for more princess party ideas? Check out this princess party, this Disney inspired princess party, these princess party games, this Frozen princess party, these princess dress ideas and this princess crown tutorial!
When we set out to plan my daughter’s Princess Party, I KNEW I wanted a giant castle. Originally, I had planned to make one out of cardboard boxes. I found this adorable Castle on Pinterest. I gave the pictures to my husband and said “can you make me this?” A few days later, he blew me away when he presented me with plans for a large foam castle with realistic looking bricks. Rocked my socks.
Today, I’m sharing the tutorial, so you too can have an amazing play castle…
How to build a Princess Castle for your party
Materials:
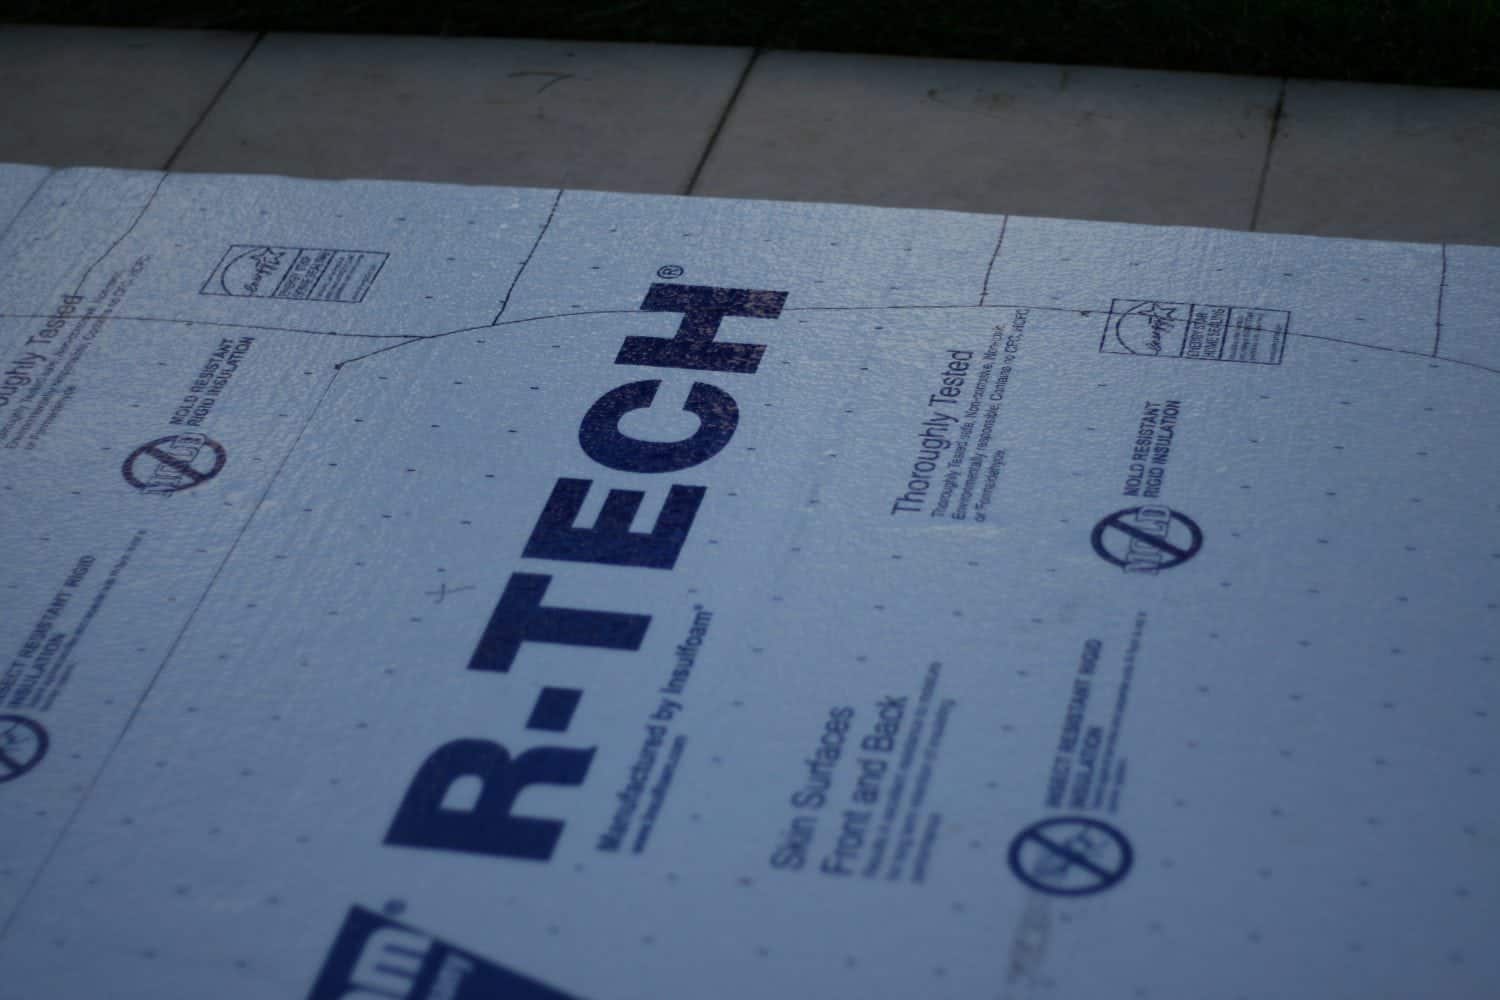
- 8×4 sheets of insulation foam (1”-1.5” thick) size of castle will determine # of sheets needed
- Paint stripping heat gun (we used this one: Kawasaki 840015 Black 10-Piece Heat Gun Kit
 )
) - 2” & 4” paint brushes
- 4” paint roller
- Paint trays
- Black spray paint (flat)
- 2 shades of grey paint
- Duct tape
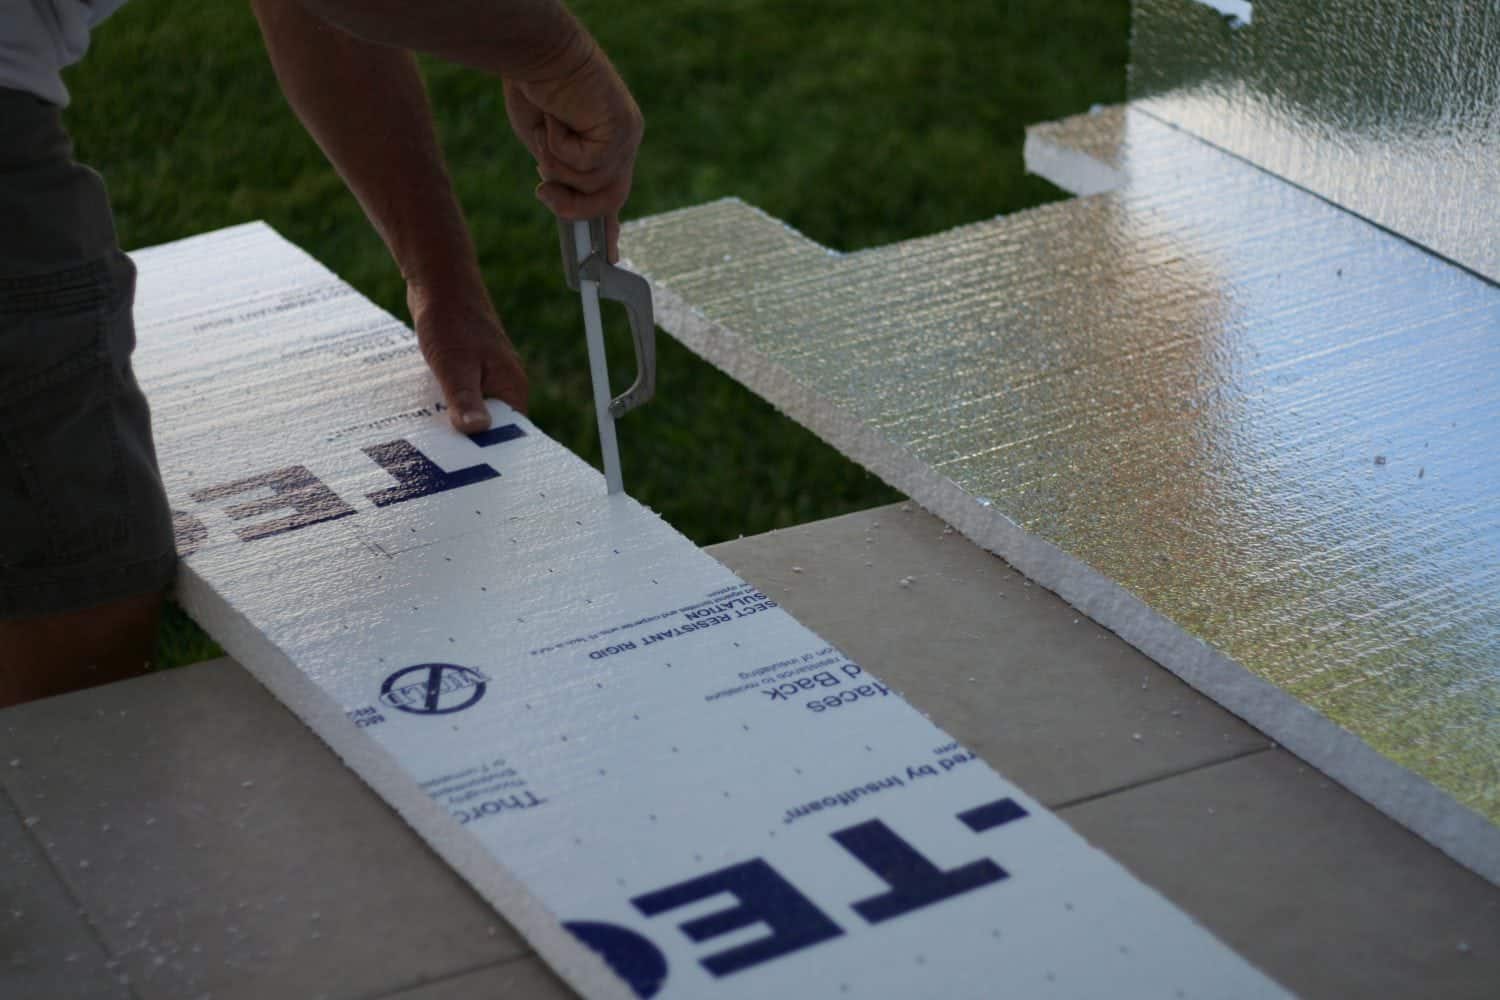
- Foam saw or fine toothed hacksaw (without the bar over the blade)
- 2 cans of spray adhesive
- Yardstick
- Drop cloth
Instructions:
- Measure 3 sheets into 2’x8’ strips
- Using the saw, cut 3 sheets into 2’ x 8’ strips (6 strips). These will be used to make the two towers
-
Cut crenellations (the cutouts on the top of the wall that make it look “castle-y”) into one end of each strip. Crenellations should be measured 6”x6” on the outer edges with the crenel (low part) being centered and measuring 12” long.
-
Using another sheet of foam, cut 4 rectangles measuring 6”x12”. These will be used to make the crenellations on the castle wallTurn a full sheet of foam on its side so it stands 4’ tall and attach the crenellations 1’ apart.
-
Use the spray adhesive and then duct tape the back side

- Draw and cut out doors, windows, arrow slits, etc. as desired. Push the saw slowly into the foam and begin cutting at your desired location
-
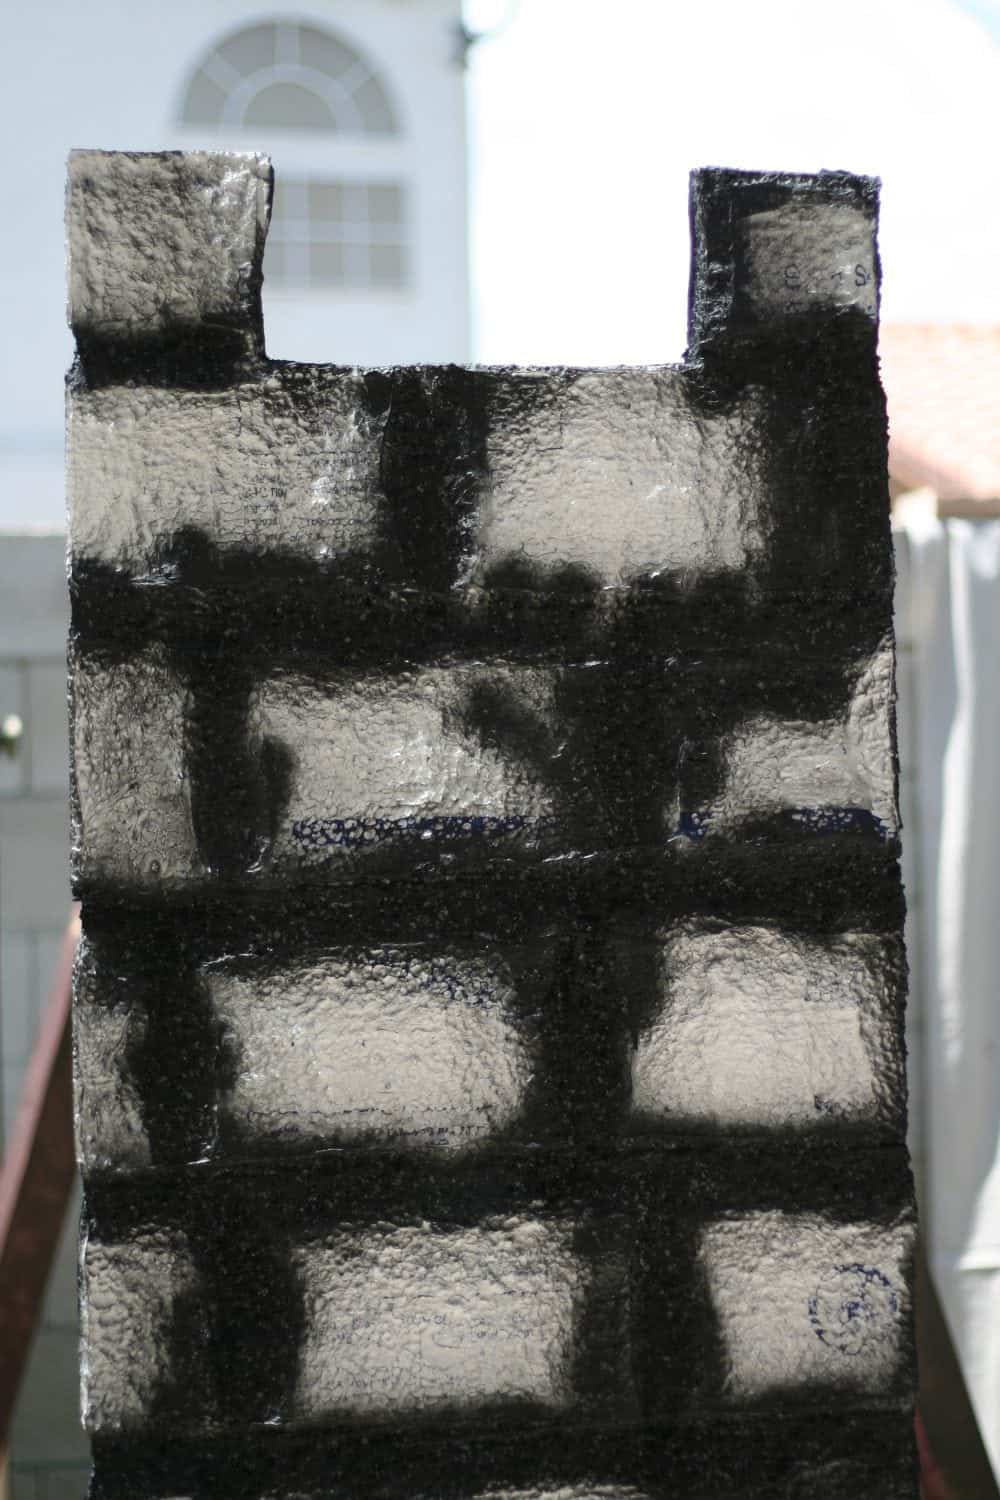
Once all of the crenellations have been cut/attached lay all of the pieces of foam on the ground to carve the bricks. Make sure the drop cloth is underneath the foam. (Heat gun will stain/burn brick and other exposed surfaces.)
-
Using a sharpie or other marker, draw out 6”x12” bricks onto the foam sheets. These should be staggered to look like a brick wall
-
Once the bricks have been drawn, use the heat gun to melt grooves into the foam sheets. The gun works very quick and will melt all the way through
-
Tip: Be sure to practice on scrap foam before you start melting your walls. Deep pits can add character to your castle and mistakes can be covered up during the painting as long as they don’t melt all the way through
-

- After the “mortar” lines have been melted, you can use the heat gun to add texture to the brick surfaces. Move the heat gun quickly in a back and forth motion to prevent too much melting
-
After all of the bricks have been cut out, use the black spray paint to paint all of the “mortar” lines. Spray paint will also melt the foam some
-
When the spray paint dries, use the four inch roller to paint on the darker of the two grey paints. This paint should only be applied to the “brick” surfaces, not the “mortar” surfaces.
-
The 2” brush can be used to thin the mortar lines and to get into any of the “brick” texturing that was left unpainted by the roller

-
Once the darker grey has dried, use a dry brush technique to apply the light grey pain. Use a 4” brush. Get most of the paint off of the brush before you begin painting.
-
You only want to highlight the raised surfaces/texture of the bricks with the light grey, leaving the lower spots the darker grey.
-
Use the spray adhesive to attach all of the sheets together. Spray each surface that will be attached and let the adhesive become tacky before pressing the pieces together.
-
As the spray begins to dry, use duct tape to secure the joints. Tape along the inside of each joint

-
Secure the castle by taping it to existing posts or to the ground with rope & stakes.

Because the castle is made of foam, it is very light weight, so you will want to secure it in place. We also got the kiddos involved in the painting…they had a blast!!
Let me know if you have any questions about this castle tutorial. Happy Castle Building!!!
Conclusion for DIY Backyard Castle
Creating a princess party is all about bringing a little extra magic to the everyday, and few things accomplish that quite like a custom DIY castle. These projects become more than decorations—they become memories. And that’s really the heart of what we do when we craft parties for our kids. We build environments from scratch that make them feel seen, celebrated, and full of imagination.
This castle tutorial is the perfect example of how accessible and impactful a handmade party element can be. You don’t have to spend a fortune or hire a stylist to create something stunning. With simple materials and a straightforward design, you can completely transform your space into a royal backdrop worthy of a storybook. The best part is that this project grows with your creativity. Want shorter towers? Add them. Want glittery accents or cut-out windows? Go for it. Want to paint bricks, hang banners, attach a personalized printable name plaque from the shop, or even add fairy lights? You can—and each little detail adds personality and charm.

These kinds of focal pieces also help anchor the rest of your decor. Once the castle is in place, the rest of your styling becomes effortless. Your dessert table pops. Your treats look more magical. Your princess printables stand out. And your photos become keepsakes that your family will treasure long after the party ends. You’re not just decorating; you’re building a little world.
What I love most is how this castle brings people together. Kids immediately gather around it, imagining stories and playing pretend. Parents admire it, and you get that fun moment of “Oh my goodness, did you MAKE that?”—because yes, you did, and it looks incredible. These are the kinds of pieces that become the highlight of your child’s celebration and live in their memory as that moment they truly felt like royalty.

Whether you’re throwing a full-blown fairytale extravaganza or adding a touch of princess charm to a small at-home birthday, this castle gives your theme the spark it needs. Pair it with matching party printables, adorable princess dress-up accessories, themed cupcakes, a balloon garland, or DIY wand favors, and you have everything you need for a cohesive, magical day.
So as you plan your upcoming celebration, give yourself permission to jump into a creative project like this. It’s simpler than it looks, more fun than you expect, and absolutely worth the payoff. Watching your child walk into the room and gasp at the sight of their very own castle is a moment you will never forget. And truly—that’s what this is all about: creating joy, building memories, and crafting the kind of magic that kids carry with them long after the party ends.
Your princess is going to love this. And you’ll love how easy it is to make her feel like the royalty she already is.
If you love this tutorial, please pin this image to your Birthday Pinterest Board:

RELATED POSTS FOR PRINCESS Castle Tutorial:
- 28+ Princess Party Ideas for Birthdays
- Princess Party Cookes, Cakes + Food Ideas
- Olaf Themed Frozen Party
- DIY Frozen Olaf Oreos
- Descendants Party Ideas
- Vintage Princess Party Hats Tutorial
- Trending Party Themes for Girls
- Shabby Chic Princess Party Ideas
- Snow White’s Candied Apples Recipe
- Princess Party Games and Activities
- Amazing Disney Princess Dresses
- Disney themed Princess Party
- Princess Crown Tutorial
- Once Upon a Princess Party

Pingback: {Storybook Inspired} Colorful Princess Party // Hostess with the Mostess®
Pingback: Princess Party: Aubrey's 4th Birthday Storybook Celebration (Part 1) - Mimi's Dollhouse
Pingback: Princess Party: Aubrey's 4th Birthday Storybook Celebration (Part 2) - Mimi's Dollhouse
Pingback: Princess Party: Princess Crown Tutorial - Mimi's Dollhouse
Pingback: Read Prince Caspian with the Kids! (Narnia Book Club Meeting Activities) - Minivan Adventures